@[TOC](Spring Cloud Stream 笔记补充)
简介 Spring Cloud Stream 是一个用来为微服务应用构建消息驱动能力的框架。它可以基于 Spring Boot 来创建独立的、可用于生产的 Spring 应用程序。Spring Cloud Stream 为一些供应商的消息中间件产品提供了个性化的自动化配置实现,并引入了发布-订阅、消费组、分区这三个核心概念。
通过使用 Spring Cloud Stream,可以有效简化开发人员对消息中间件的使用复杂度,让系统开发人员可以有更多的精力关注于核心业务逻辑的处理。但是目前 Spring Cloud Stream 只支持 RabbitMQ 和 Kafka 的自动化配置。
Spring Cloud Stream 提供了 Binder (负责与消息中间件进行交互),我们则通过 inputs 或者 outputs 这样的消息通道与 Binder 进行交互。
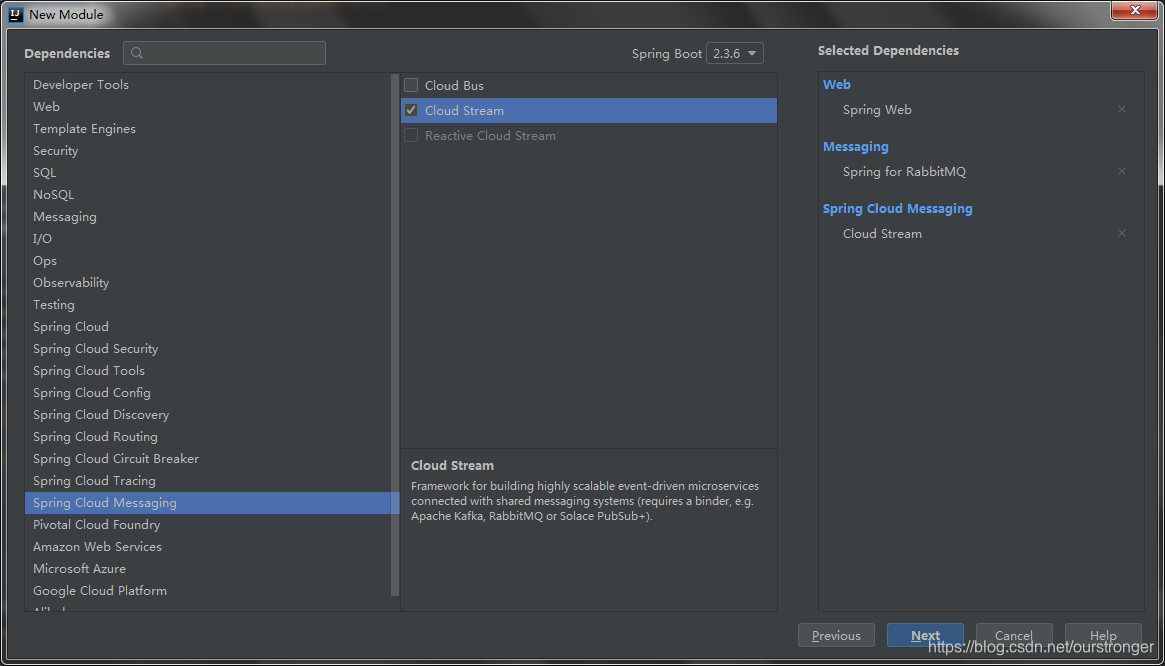
HelloWorld 创建一个Spring Cloud Stream项目,添加如下三个依赖:
spring.rabbitmq.host=192.168.1.132
spring.rabbitmq.port=5672
spring.rabbitmq.username=guest
spring.rabbitmq.password=guest
然后创建一个简单的消息接收器 :
@EnableBinding(Sink.class) public class MsgReceiver private static final Logger logger = LoggerFactory.getLogger(MsgReceiver.class); @StreamListener(Sink.INPUT) public void receive (Object payload) logger.info("received: " + payload); } }
启动 stream 项目,然后在 rabbitmq 后台管理页面去发送一条消息:
自定义消息通道 首先创建一个名叫 MyChannel 的接口:
public interface MyChannel String INPUT = "test-input" ; String OUTPUT = "test-output" ; @Input(INPUT) SubscribableChannel input () ; @Output(OUTPUT) MessageChannel output () ; }
注意:
两个消息通道的名字是不一样的
从 F 版开始,默认使用通道的名称作为实例命令,所以这里的通道名称不同 (早期版本可以相同),这样的话,为了能够正常收发消息,需要我们在 application.properties 中做一些额外的配置。
接下来自定义一个消息接收器 :
@EnableBinding(MyChannel.class) public class MsgReceiver1 private static final Logger logger = LoggerFactory.getLogger(MsgReceiver1.class); @StreamListener(MyChannel.INPUT) public void receive (Object payload) logger.info("received1: " + payload + ":" + new Date()); } }
定义 HelloController 进行测试:
import org.springframework.beans.factory.annotation.Autowired;import org.springframework.integration.support.MessageBuilder;import org.springframework.web.bind.annotation.GetMapping;import org.springframework.web.bind.annotation.RestController;@RestController public class HelloController @Autowired MyChannel myChannel; @GetMapping("/hello") public void hello () myChannel.output().send(MessageBuilder.withPayload("你好 spring cloud stream!" ).build()); } }
这时,因为现在这两个通道的名称不同,为了让消息输入输出通道对接上,再增加一些额外配置。
# 此处的test-input/test-output 与实际的输入输出通道一致即可,test-topic 要配置一样;
spring.cloud.stream.bindings.test-input.destination=test-topic
spring.cloud.stream.bindings.test-output.destination=test-topic
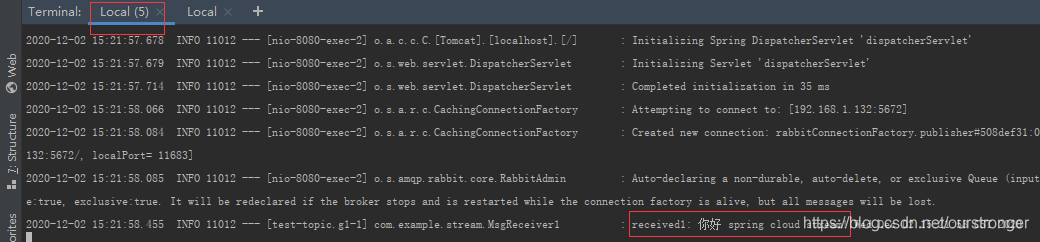
启动服务,访问 http://localhost:8080/hello,如下:
消息分组 紧接上文。默认情况下,如果消费者是一个集群,此时,一条消息会被多次消费。通过消息分组,我们可以解决这个问题。
添加如下配置分组,放入组 g1:
spring.cloud.stream.bindings.test-input.destination=test-topic
spring.cloud.stream.bindings.test-output.destination=test-topic

spring.cloud.stream.bindings.test-input.group=g1
spring.cloud.stream.bindings.test-output.group=g1
然后对 Spring Cloud Stream 项目进行打包,打包完毕后,在 target 目录下分别启动:
java -jar stream-0.0.1-SNAPSHOT.jar
java -jar stream-0.0.1-SNAPSHOT.jar --server.port=8081
运行访问 http://localhost:8080/hello
同一个消息只能被一个实例消费 ,至于是哪一个,不可控。但是可以确定的只被一个实例消费。
消息分区 在分组的基础上,通过消息分区可以实现相同特征 的消息总是被同一个实例处理。只需要添加如下配置即可:
# 分为同一个组g1
spring.cloud.stream.bindings.test-input.group=g1
spring.cloud.stream.bindings.test-output.group=g1

# 开启消息分区 (消费者上配置)
spring.cloud.stream.bindings.test-input.consumer.partitioned=true
# 消费者实例个数 (消费者上配置)
spring.cloud.stream.instance-count=2
# 当前实例的下标 (消费者上配置)
spring.cloud.stream.instance-index=0
# (生产者上配置)【此处为方便放一起】
# 表示消息将被下标为1的消费者所消费
spring.cloud.stream.bindings.test-output.producer.partition-key-expression=1
# 消费端的节点数量(生产者上配置)
spring.cloud.stream.bindings.test-output.producer.partition-count=2
注意,启动时 spring.cloud.stream.instance-index 参数要修改:
java -jar stream-0.0.1-SNAPSHOT.jar --server.port=8080 --spring.cloud.stream.instance-index=0
java -jar stream-0.0.1-SNAPSHOT.jar --server.port=8081 --spring.cloud.stream.instance-index=1
然后继续 多次 访问 http://localhost:8080/hello ,由于配置了spring.cloud.stream.bindings.test-output.producer.partition-key-expression=1 ,并且正如上文所说,此时的消息具有相同的特征 。所以消息将被下标为 1 的消费者所消费 ,也就是 8081 端口消费,不会被 8080 端口消费。如下图:
定时任务 每天定时执行的任务,可以使用 cron 表达式, 有一种比较特殊的定时任务,例如几分钟后执行,这种可以结合 Spring Cloud Stream + RabbitMQ 来实现。
首先需要下载一个 rabbitMQ 插件:点击这里下载
执行如下命令:
 # 将上传的文件解压
 unzip rabbitmq_delayed_message_exchange-20171201-3.7.x.zip
 # 将解压后的文件拷贝到 docker 容器中【lemon-rabbit 是docker中rabbitmq 的 NAMES】
docker cp /root/rabbitmq_delayed_message_exchange-20171201-3.7.x.ez lemon-rabbit:/plugins
 # 进入到容器中
docker exec -it lemon-rabbit /bin/bash
 # 启用插件
rabbitmq-plugins enable rabbitmq_delayed_message_exchange
 # 查看是否启用成功
rabbitmq-plugins list
配置文件中开启消息延迟功能:
# 绑定通道
spring.cloud.stream.bindings.test-input.destination=topic
spring.cloud.stream.bindings.test-output.destination=topic

# 开启消息延迟功能
spring.cloud.stream.rabbit.bindings.test-input.consumer.delayed-exchange=true
spring.cloud.stream.rabbit.bindings.test-output.producer.delayed-exchange=true
在消息发送时,将消息延迟设置为 3 秒:
@RestController public class HelloController private static final Logger logger = LoggerFactory.getLogger(MsgReceiver1.class); @Autowired MyChannel myChannel; @GetMapping("/hello") public void hello () logger.info("send msg:" +new Date()); myChannel.output().send(MessageBuilder.withPayload("你好 spring cloud stream!" ).setHeader("x-delay" ,3000 ).build()); } }
同时在消息接收时,打印出延迟时间:
@EnableBinding(MyChannel.class) public class MsgReceiver1 private static final Logger logger = LoggerFactory.getLogger(MsgReceiver1.class); @StreamListener(MyChannel.INPUT) public void receive (Object payload) logger.info("received1: " + payload + ":" + new Date()); } }
然后启动项目,访问 :http://localhost:8080/hello ,延迟3秒 ,如下图:https://github.com/astronger/springcloud-simple-samples
为正常使用来必力评论功能请激活JavaScript